
A simple demo of OPC UA server and client
Introduction
OPC-UA has been established as one of the most common communication protocol in the Industrial Internet of Things (IIoT) spaning from field level to the enterprise level.
This article will show how simple it is to build a server / client projects. The programming language is purely the author’s choice.
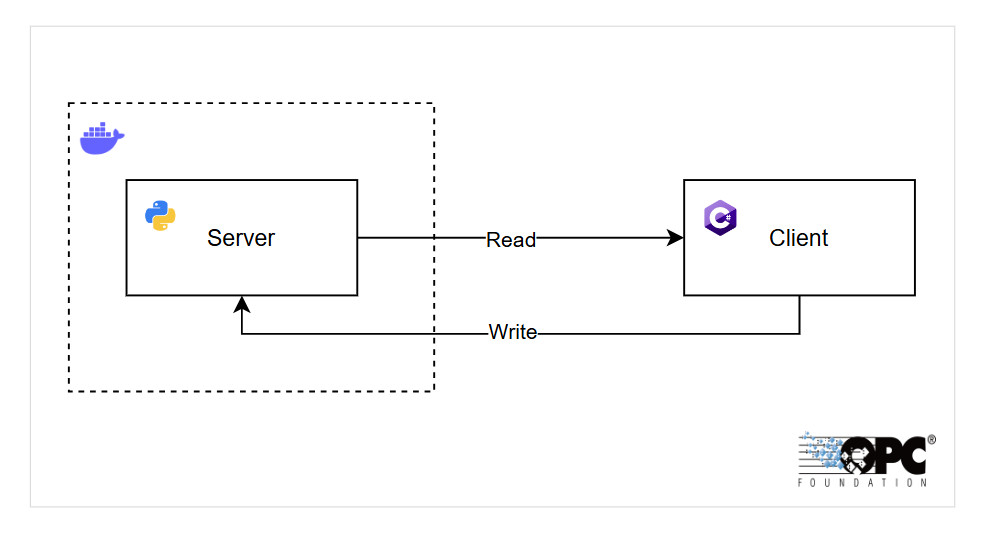
What will be built at the end of this article
- OPC-UA Server in
pythonhaving analog, digital and string variables - OPC-UA Client using
.net winforms - Containierize the server
Let`s build
The server
The OPC-UA server is going to be developed in python. For the development, create a virtual environment. For this article, I will be using poetry.
-
Open up a terminal and initialize a virtual environment
poetry init -
Install the dependencies
poetry add asyncua -
Create a file
server.py -
Add the import
import asyncioimport loggingfrom asyncua import Server, uafrom asyncua.common.methods import uamethod -
Create a
mainfunction and setupserverasync def main():_logger = logging.getLogger(__name__)# setup our serverserver = Server()await server.init()# endpoint is freely defined, provided the schema, ip-address and port number are presentserver.set_endpoint("opc.tcp://0.0.0.0:4840/basdemo/")# Add security policies to allow anonymous accessserver.set_security_policy([# Allow anonymous access (no security)ua.SecurityPolicyType.NoSecurity,# TODO: Add other policies if necessary, like Basic128Rsa15, etc.])# set up own namespace, not really necessary but should as specuri = "https://basdemo.me"idx = await server.register_namespace(uri)-
Create an
objectandnumeric variablewithin the object# populating the address space# server.nodes, contains links to very common nodes like objects and rootmyobj = await server.nodes.objects.add_object(idx, "MyObject")myvar = await myobj.add_variable(idx, "MyVariable", 6.7)# Set MyVariable to be writable by clientsawait myvar.set_writable() -
Start the
server_logger.info("Starting server!")async with server:# update every secondwhile True:await asyncio.sleep(1)# read the valuenew_val = await myvar.get_value() + 0.1# write to the variableawait myvar.write_value(new_val)# log_logger.info("Set value of %s to %.1f", myvar, new_val) -
Start the script
if __name__ == "__main__":logging.basicConfig(level=logging.DEBUG)# actual start of the ua-serverasyncio.run(main(), debug=True)
-
-
Start the
server- Switch to the virtual environment
poetry shell- Start the server
python server.py- Sample start output
INFO:asyncio:<Server sockets=(<asyncio.TransportSocket fd=480, family=2, type=1, proto=6, laddr=('0.0.0.0', 4840)>,)> is servingINFO:asyncua.server.binary_server_asyncio:Listening on 0.0.0.0:4840DEBUG:asyncua.server.server:OPC UA Server(opc.tcp://0.0.0.0:4840/server/) server startedINFO:__main__:Set value of ns=2;i=2 to 6.8INFO:__main__:Set value of ns=2;i=2 to 6.9INFO:__main__:Set value of ns=2;i=2 to 7.0
The client
Now let’s create the client to interact with the server in Visual Studio 2022
-
Create a
Windows Forms Appin C# language -
Give a project name:
OPC.Client.Demoand select a folder to store the solution -
Select
.NET 8.0 (Long Term Support)(at the time of writing, this is the latest LTS version) -
In the Form-Designer, make the following:
Control Name Text Description Label lblStatus Display the connection status Label lblNodeValue Shows the current node-value Label label1 OPC Server Label label2 Node ID — — — Textbox txtServerUrl opc.tcp://localhost:4840/server Set the server url Textbox txtNodeId Set the Node-ID Textbox txtNodeWrite Write value to the node id — — — Button btnConnect Connect Connect to the server Button btnNodeRead Read Read value of the node-id Button btnNodeWrite Write Write to the node 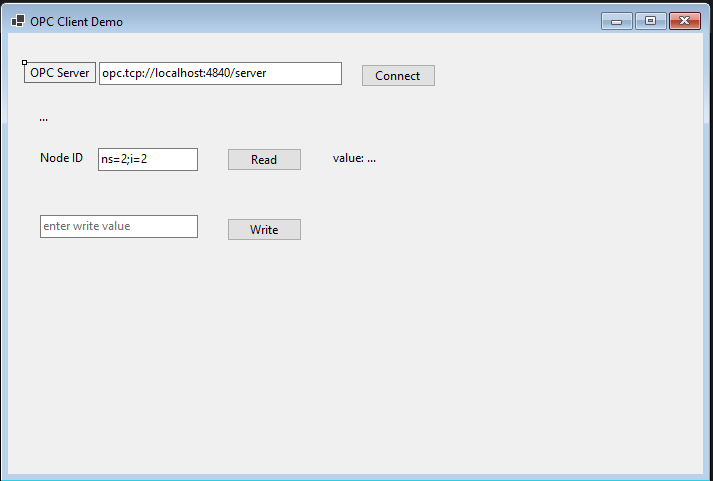
-
Install the Nuget package
OPCFoundation.NetStandard.Opc.Ua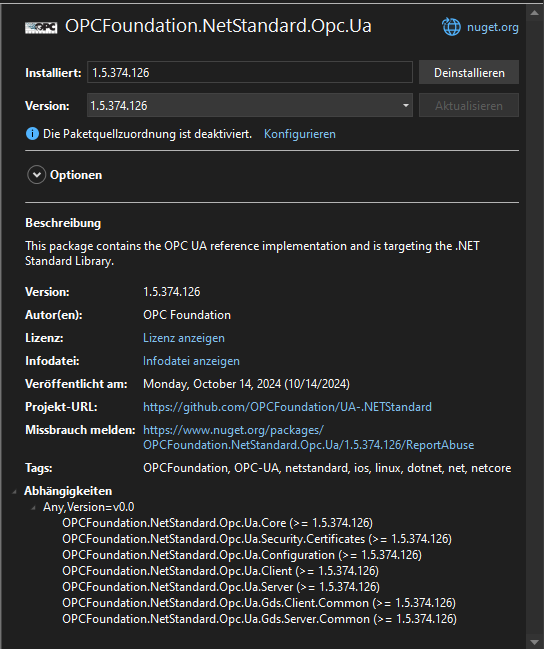
-
Use the following code
-
In the
Form1.csadd 2 private variablesusing Opc.Ua;using Opc.Ua.Client;using Opc.Ua.Configuration;using System.Globalization;namespace OPC.Client.Demo{public partial class Form1 : Form{private ApplicationInstance _application;private Session _session;public Form1(){InitializeComponent();}//Rest of the code commes here}} -
Function: Button - Connect
private async void btnConnect_Click(object sender, EventArgs e){lblStatus.Text = "...";try{// Create and configure the OPC UA application_application = new ApplicationInstance{ApplicationName = "OpcClientDemo",ApplicationType = ApplicationType.Client,ApplicationConfiguration = new Opc.Ua.ApplicationConfiguration(){ApplicationName = "OpcClientDemo",ApplicationType = ApplicationType.Client,ClientConfiguration = new ClientConfiguration()}};// Connect to the servervar endpointUrl = CoreClientUtils.SelectEndpoint(txtSeverUrl.Text, false);var endpointConfig = EndpointConfiguration.Create(_application.ApplicationConfiguration);var endpoint = new ConfiguredEndpoint(null, endpointUrl, endpointConfig);_session = await Session.Create(_application.ApplicationConfiguration, endpoint, false, "OpcUaClientGuiSession", 60000, new UserIdentity(new AnonymousIdentityToken()), null);lblStatus.Text = $"{DateTime.Now.ToString(CultureInfo.InvariantCulture)} Connected to OPC UA server.";}catch (Exception ex){lblStatus.Text = $"{DateTime.Now.ToString(CultureInfo.InvariantCulture)} Connection failed: " + ex.Message;}} -
Function: Button - Read
private async void bntNodeRead_Click(object sender, EventArgs e){try{var nodeIdToRead = new NodeId(txtNodeId.Text); // Get Node ID from the TextBoxvar readValue = await _session.ReadValueAsync(nodeIdToRead);lblNodeValue.Text = "value: " + readValue.ToString();}catch (Exception ex){//TODO: handle error}} -
Function: Button - Write
private void btnNodeWrite_Click(object sender, EventArgs e){try{// Retrieve the NodeId and the value from the text boxesvar nodeId = new NodeId(txtNodeId.Text);var valueToWrite = new Variant(Convert.ToDouble(txtNodeWrite.Text)); // Use appropriate data type// Create a WriteValue object for the specified variablevar writeValue = new WriteValue{NodeId = nodeId,AttributeId = Attributes.Value,Value = new DataValue(valueToWrite)};// Write to the variableWriteValueCollection writeCollection = [writeValue];_session.Write(null, writeCollection, out var results, out _);}catch (Exception ex){//TODO: handle error}} -
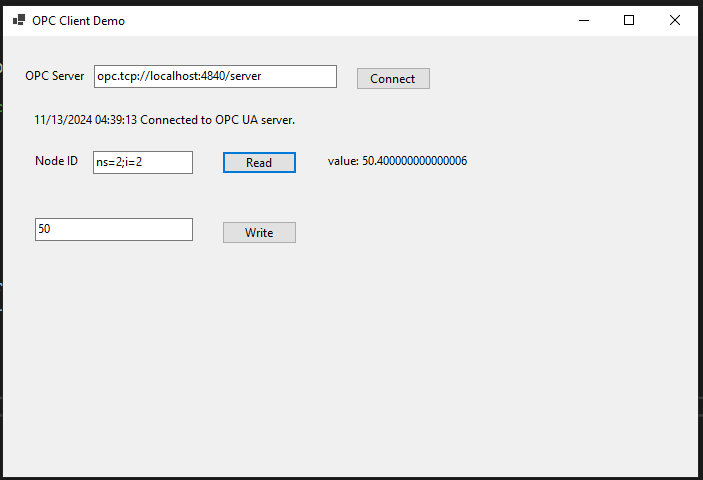
Now start the
Windows Formproject.
-
Containierize the server
-
Create the
requirements.txtfile usingpoetrypoetry export --output requirements.txt --without-hashes --without-urls- —without-hashes removes the package hashes
- —without-urls removes the package urls
-
Create a
Dockerfile# Use the official Python image from the Docker HubFROM python:3.11-slim# Set the working directory in the containerWORKDIR /app# Copy the Python script into the containerCOPY server.py requirements.txt .# Install required packagesRUN pip install --no-cache-dir -r requirements.txt# port to be exposedEXPOSE 4840# Command to run the scriptCMD ["python", "server.py"] -
Build the image
docker build -t opcua-demo-image . -
Create a
docker-compose.ymlfilename: opcua-demoservices:opcua-demo:image: opcua-demo-imagecontainer_name: opcua-demorestart: alwaysports:- 4840:4840 -
Now you can start the
serverin network and not worry about local environment
Future tasks
- Make the communication secure
- Setup functions
- Setup alarms and conditions
- Setup information model